So you fancy giving cross stitch a go ? There are so many options out there you could perhaps buy a cross stitch magazine with a free cover kit and see how you feel. Some of the cover kits can be pretty tricky though with lots of fractional stitches and backstitching in a little space. Or you may find a cross stitch chart you fancy but then you would also need to purchase the aida/linen , threads and needles separately which can turn out to be pretty costly. So I suggest getting yourself a cross stitch kit. The one I am demonstrating with is from DMC and along the side they give you an idea of how tricky it may be...there are three levels on them easy, moderate and advanced. So if this is your first go at cross stitching I suggest a easy or moderate kit.

Inside a cross stitch kit you get everything you need to get started.
Aida

Needles

Chart (sorry the photo doesn't do the chart justice)

Threads and thread card. Sometimes the threads come pre-sorted with kits and other times they don't. With this kit they didn't come pre-sorted. First I drew the symbols on the thread card and then sorted the threads into the colours...each colour has a different symbol.

This photo has come out really bad ...but it is meant to show the key that is given for the threads showing each thread has a different symbol. Also at the side of each thread on the key there is a number in brackets this tells you how many skeins of threads you should have in that colour. Such as the colour white uses a dot symbol and you should have 7 skeins of that colour. Each skein is made up of 6 separate strands.
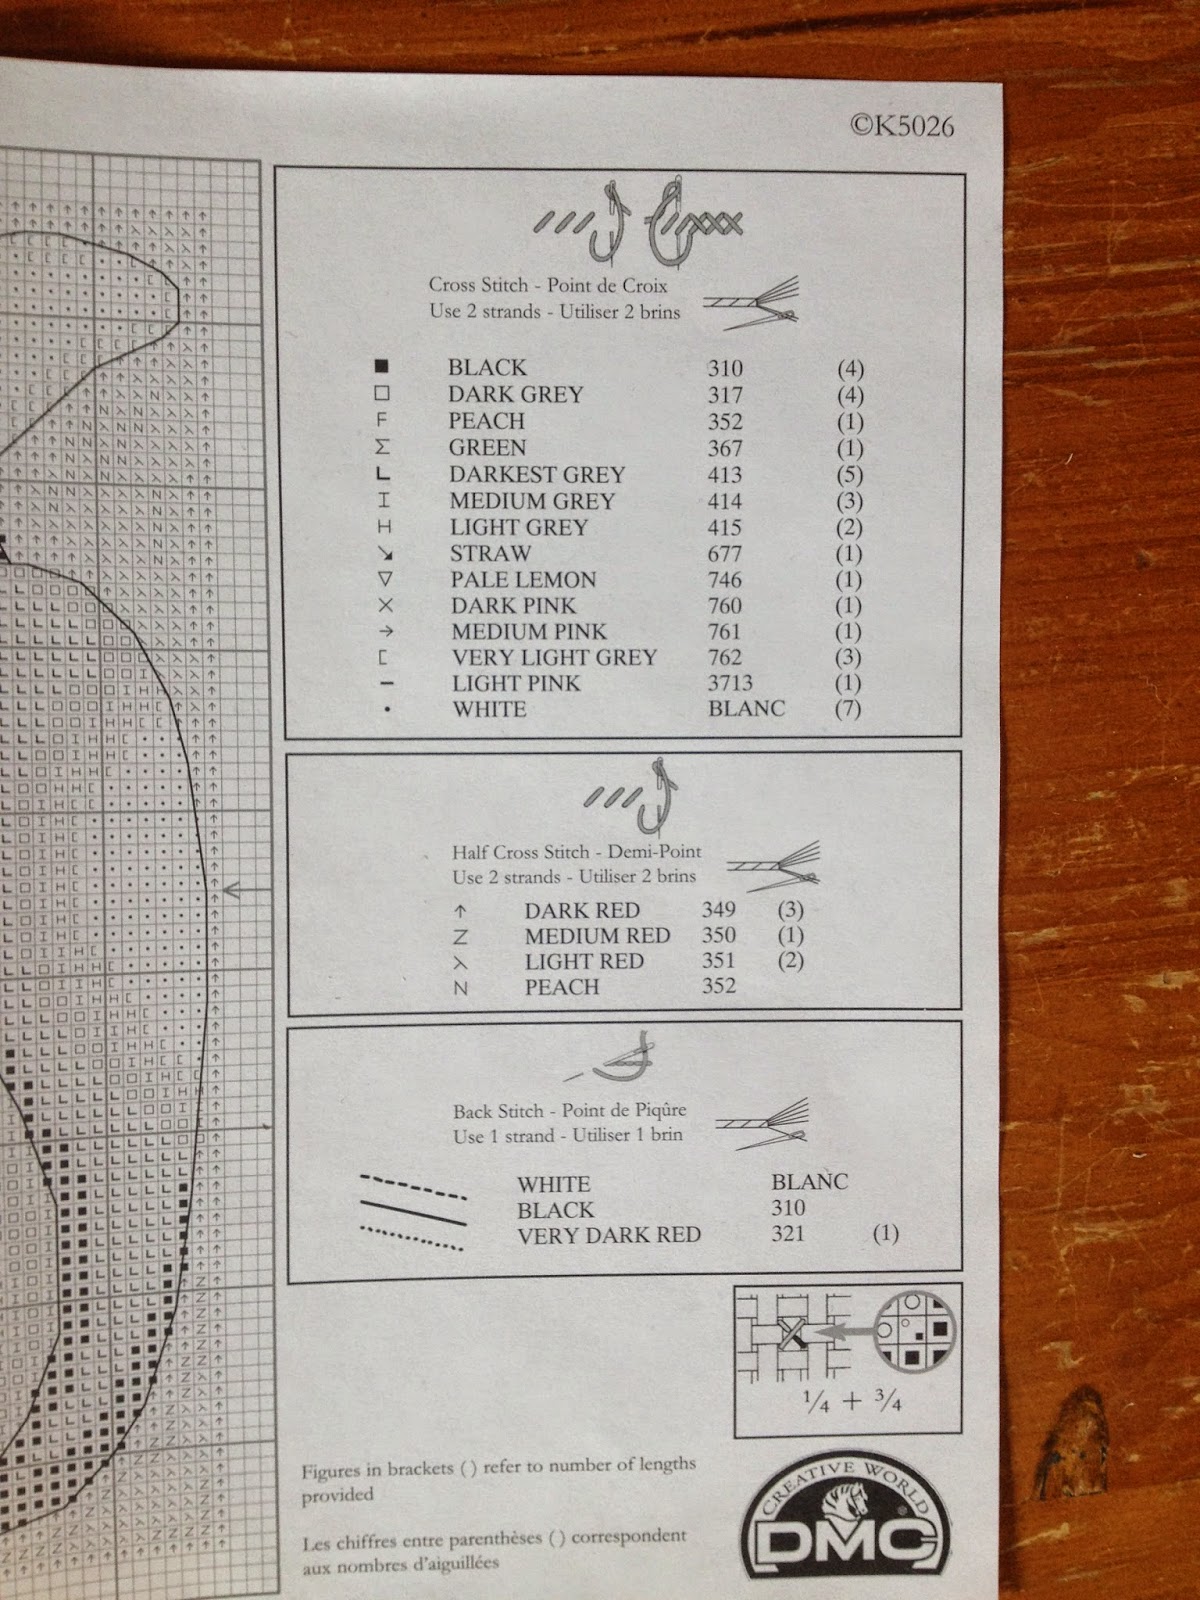


So I can see that the middle of my chart is a dot which means I need to use white colour thread.

This bit at the top of the key tells me that I need to use 2 strands to stitch these parts.

I take one skein of thread off the thread card and pull out one strand of thread from it. I thread that onto my needle and put the others back onto the thread card.

I use the loop method to stitch with hence me only taking one strand and not two from the skein. Using the loop method means I don't have to use any knots and keeps the back of my stitching neater and gives it no bumps. So to do the loop method I fold the thread in half so the start and end of the thread are level and thread them both through the needle. This then gives me the 2 strands required to stitch this part.

Aida is made up of lots of little squares...14 count aida has 14 holes per inch...16 count 16 holes per inch etc . Now you push the needle up through the back of your aida through the hole nearest the middle of it. But don't pull the thread all the way through.


Pull it though and then put it through the hole diagonal to that one. You then pull the thread through the bottom hole as shown.


In the next blog I'll show you how I'm doing with this kit and will hopefully show you how to do backstitching .